SharePoint Walktrough - Displaying List Items with their attachments Part 1/2
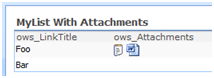 The SharePoint Out Of the Box List View Web Part is quite powerful, yet it isn’t able to display the attachments of a List Item. It can show if an item has any attachments (with a nice paper-clip icon) but you won’t be able to download these attachments directly. As with most SharePoint limitation, there is a workaround. Drasko Popovic wrote about a JavaScript based workaround on CodeProject you might want to check out at http://www.codeproject.com/KB/sharepoint/DataViewAttachments.aspx.
In this post I want to presents you another workaround where all processing are done server-side with a single Web Service call (Lists.asmx). You will need SharePoint Designer 2007 (freely downloadable since the 2nd April 2009 at http://www.microsoft.com/downloads/details.aspx?FamilyID=baa3ad86-bfc1-4bd4-9812-d9e710d44f42&displaylang=en ) and of course a MOSS or WSS instance.
As this walkthrough is pretty long for a blog post, it is split into two parts. If you already how to create a Data View web part to display the elements of a list through calls to the Lists.asmx web service, I would suggest you to move to part 2 of this walkthrough.
The SharePoint Out Of the Box List View Web Part is quite powerful, yet it isn’t able to display the attachments of a List Item. It can show if an item has any attachments (with a nice paper-clip icon) but you won’t be able to download these attachments directly. As with most SharePoint limitation, there is a workaround. Drasko Popovic wrote about a JavaScript based workaround on CodeProject you might want to check out at http://www.codeproject.com/KB/sharepoint/DataViewAttachments.aspx.
In this post I want to presents you another workaround where all processing are done server-side with a single Web Service call (Lists.asmx). You will need SharePoint Designer 2007 (freely downloadable since the 2nd April 2009 at http://www.microsoft.com/downloads/details.aspx?FamilyID=baa3ad86-bfc1-4bd4-9812-d9e710d44f42&displaylang=en ) and of course a MOSS or WSS instance.
As this walkthrough is pretty long for a blog post, it is split into two parts. If you already how to create a Data View web part to display the elements of a list through calls to the Lists.asmx web service, I would suggest you to move to part 2 of this walkthrough.
0 – Principle/Rationale
We have a list in a SharePoint site and want to display the titles of this list’s elements along with direct links to their attachments. We are going to create a Data View Web Part using SharePoint Designer, this Data View will consume the SharePoint Web Service to get the items of a list along with their attachments. The data view will display these items using a XSL we will define. As a bonus this method will allows us to display the list items on a different SharePoint site or collection than the list itself.
1 – Create or Open a page
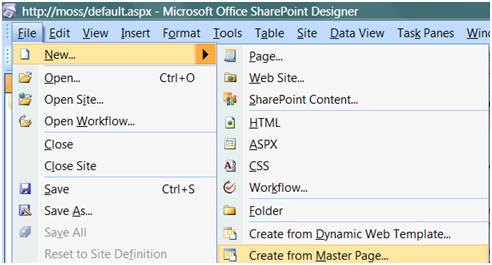
In SharePoint Designer after opening your site, either open an existing page or create a new one. I choose this last option:
 Make some room for our content in the PlaceHolderMain zone of the page by creating a custom content.
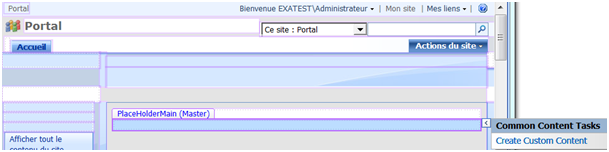 Adding a Web Part zone isn’t mandatory but I strongly recommend it at this point. Click in the new Custom Content Zone you created in the design view, then click Insert|SharePoint Controls| Web Part Zone.
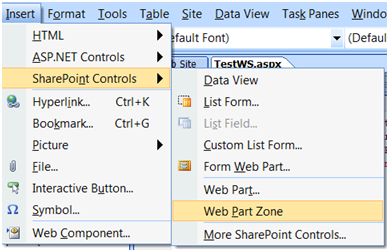 You should get something looking like that in the Design View:
 SharePoint Designer is sometimes quite buggy, saving frequently from this point on might be a good idea. You can save the page wherever you want to. If you are creating multiple custom pages, creating a dedicated Document Library to hold these pages is a good idea; such a library already exists if you have activated the publication feature.
2 – Create a Web Service Data Source
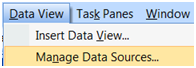 The page is now ready to host our Data View web part. Open the Data Source view by clicking Data View| Manage Data Sources.
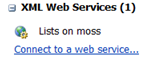 Choose to connect to a web service:
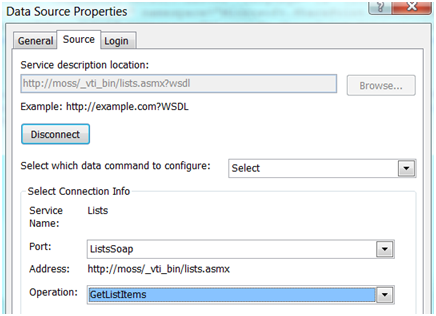
In the Service Description Location enter: http://SP_SITE_URL/_vti_bin/lists.asmx, then click connect and choose the GetListItems operation:
Choose to connect to a web service:
In the Service Description Location enter: http://SP_SITE_URL/_vti_bin/lists.asmx, then click connect and choose the GetListItems operation:
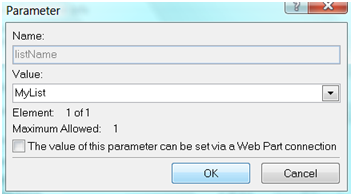 Double click on the listName parameter and enter the name or guid (between brackets {}) of your list.
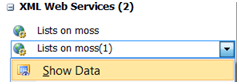 Validate the Data Source Properties and check that it is working correctly by trying to see the data returned by this data source:
If a new panel opens with the list data, it means it’s working.
Validate the Data Source Properties and check that it is working correctly by trying to see the data returned by this data source:
If a new panel opens with the list data, it means it’s working.
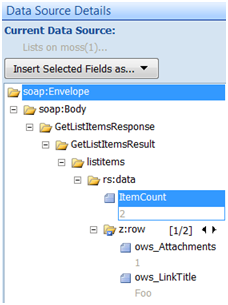
Troubleshooting:
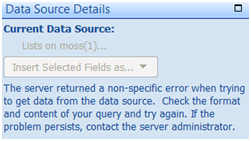
If it isn’t working you will be presented with an enigmatic error message giving you absolutely no details:
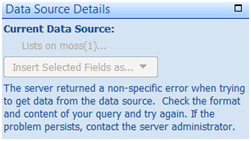 This can be caused by numerous reasons you want to check:
- The name or guid of the list is invalid
- You tried to specify other parameters of the Web Service such as QueryOptions or ViewFields. These parameters can’t be specified at this point as the SharePoint Designer Team Blog attests it (http://blogs.msdn.com/sharepointdesigner/archive/2008/06/20/data-source-issues-and-workarounds.aspx). We will modify those latter on.
- Problem of authentication, I need to investigate this problem but it seems like you sometimes can’t use the integrated authentication even when using a single WFE. In this case you have to change the Web Service Authentication method to basic and to specify a domain account that has the appropriate permission to read the list items and contact the web service.
Changing the Web Service authentication:
Open the Data Source properties
 Open the login tab and choose basic authentication:
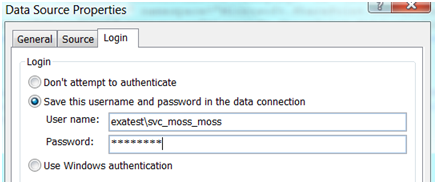 Save the details and try again to retrieve the data.
3 – Create the Data View Web Part
We now have a working Data Source, let’s create a web part to display it.
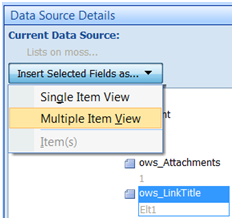
In the Data Source Details, select the ows_LinkTitle and ows_Attachments properties and choose insert this field as a Multiple Item View (Note: you might need to select the Web Part zone in the design view of the page beforehand).
 You shall now see something like that in the design view.
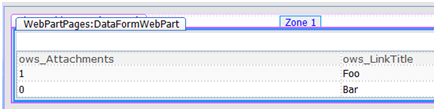 We know have a very basic Data View Web Part but as you may have noticed the ows_attachments fields just display the number of attachments but not the actual links to these attachments.
We will see in part 2 of this walkthrough how to solve this.
We know have a very basic Data View Web Part but as you may have noticed the ows_attachments fields just display the number of attachments but not the actual links to these attachments.
We will see in part 2 of this walkthrough how to solve this.